 |
| Cupcake on top of my first cake |
Right away the second week we were to bake a cake and bring it to class to level, split, fill, ice and decorate. This was all very intimidating to me especially after the day I'd had. I had been in Des Moines for my nephew's baptism so Monday morning I had to get up and drive almost three and a half hours back home. Then start laundry, run to the grocery store, and come home and bake a cake. Oh...and last but not least whip up my first double batch of Wilton buttercream frosting...phew! By the time class rolled around I was pretty pooped already. Now I had to try my hand at icing and decorating in not only a room full of strangers, but a whole store! We took the classes at Jo-Ann Fabrics in Apple Valley which apparently doesn't have a separate room for classes, so we were out in the middle of everything. We had more than a few wandering onlookers each week.
This week we got a few more tips and bags dirty. The first tip we were supposed to use was 18, which in the craziness of my day I managed to leave in the little cubby of my dish drying rack but thankfully my friend let me borrow her tip 16 which is pretty close. We practiced curving lines, zig zags, dots and "dimensional decorating". I have to admit - the practice board that comes with the kit is the best invention ever. I had seen it many times in the store before and thought it was silly, but I was completely wrong! You can screw up as many times as you need to until you get the hang of it. Just wipe the board clean and try again! Definitely better than messing up a cake because you have no idea what you're doing. Speaking of messing things up because I thought I'd try something on my own...
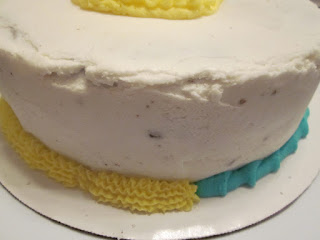

...yeah, my border didn't turn out so hot. I thought the one in the picture looked sweet so I tried it out. (Hint: theirs does not look anything like that.) For decorations that night we had our choice of the cupcake, a fish or a hamburger. My nephew told me to do the cupcake so that's the one I went for. I really dug the idea of the gel piping transfer. If you have a basic outline of the shape/design you want to do, just print it out and flip it over. Then take some piping gel and trace the outline on the back. Then flip it back right side up and gently set it down in the middle of your cake. Run your finger over the paper and your design is now on your cake ready to be filled in! Pretty neat. For the inside of the cake, the first week our instructor used one pudding Snack Pack. Since I already had enough to worry about with baking the cake and making the frosting, I thought this sounded like a grand idea. Unfortunately it turns out one pack really isn't enough...I could hardly tell there was anything in there. If I decide to do that again I will definitely use two!
Oh and yes I did bake the cake from scratch and even though I made not have done a perfect job decorating it still tasted great! Recipe to follow in another entry...stay tuned :)
No comments:
Post a Comment