Saturday, June 4, 2016

Strawberry Cream Cheese Rolls


Fun kitchen project on a rainy afternoon!


The results were quite tasty :)

Get the full recipe

Sunday, June 21, 2015

Mo-cake-ah!

What better way to travel back to Disney World than through Brazil?  I guess it may be a little more south than you need to go, but it's worth it to get some mo-cake-ah!  Or as the natives spell it...Mocequa aka Brazilian Fish Stew.  I found this recipe in "A Taste of Epcot" which I picked up while we were in WDW on our honeymoon during the Food and Wine Festival.  Brazil is not a country you can typically find in the World Showcase, but that's the beauty of being there in the fall during the festival because a ton more countries show up to serve you delicious food.

When we were there last fall, I believe we had the Cheese Bread from the Brazilian booth.  I wish they had recipes from everything they served available because that and the Berliner from Germany (a yeast doughnut filled with apricot jam) were amazing and I'd love to recreate them at home.  I'm sure I can find similar things on the internet, but it wouldn't quite be the same.


The mocequa fish stew was pretty good.  I had very high hopes for it with all the colorful ingredients that went in but it came out a little bland.  Maybe I should've added more salt?  But what I thought it really needed was more zip.  The Poblano peppers didn't add very much spice at all.  I'll have to squirt on some rooster sauce into the leftovers to see if that's the kick it's missing.

For the fish I used a combination of tilapia and perch because Cub doesn't carry any of the recommended kinds - snapper, grouper, or mahi mahi.  Where is a good place to buy fish in Minnesota?  If you have a secret spot you should definitely let me know.  And this is one of those times I wish we had some plate-bowls.  You know the kind of plates that have a flat, deep bowl in them?  Yeah my husband didn't either but I swear they exist.  Kind of like this I think...apparently they are called rimmed soup bowls?

The cookbook recommends drinking Brazil's light, refreshing Xingo Black Beer (pronounced "shin-goo") which has hints of chocolate and roasted malts with the stew.  But personally I think I'd rather have my chocolate in some mo' cake...eh?

Saturday, June 20, 2015

East Meets West...Africa!

West African Peanut Curry and Grilled Sweet Corn at Spork
After a nice relaxing vacation and some other big life events, I decided it's time to start cooking and blogging again!  Our vacation also inspired me to want to go on more vacations, but since we can't always be traveling around the globe I decided I could still cook dishes from all over the world.  So I walked over to our local library and picked up three globally inspired cookbooks - Jamie Oliver's Food Escapes, Cooking Light Global Kitchen, and Mark Bittman's The Best Recipes in the World.  I was in the mood to travel to Africa this weekend after eating some West African Peanut Curry we had in our travels to Bend, OR at a cool little place called Spork (although to our disappointment we did not see any sporks there to eat with).

I decided to begin my journey by checking out one of my favorite cookbooks - Cook's Illustrated's The Best International Recipe.  Flipping through the "Africa and the Middle East" section, I found exactly what I was looking for!

West African Sweet Potato and Peanut Soup

While it wasn't quite the same as the curry, it was pretty tasty.  I went against the advice of the book which says to stick to orange-fleshed varieties of sweet potatoes, otherwise the soup can have an unappealing color.  I bought white ones and I can see what they mean, it was very....drab looking.  But it didn't hurt the flavor at all!

We also needed a little meat in our meal and for that we had to travel all the way to the other coast of the continent.  I flipped through Cooking Light Global Kitchen's "The Middle East and Africa" section and found the perfect pairing to the soup.  That's the only section I've browsed, but so far I'm LOVING the beautiful pictures in it.  While I really like Cook's Illustrated writing style and advice from the Test Kitchen, I really do wish they had more pictures.  That's also the reason I refuse to get Kindle versions of cookbooks because drooling over all the delicious food is my favorite part of cookbooks.  It helps with the experience of wanting to travel to the different parts of the world as well.

East African Braised Chicken

This one I changed up a little bit.  Instead of doing the different chicken pieces, I only did thighs.  Also, instead of opening a bottle of wine just to use 1/2 a cup, I decided to dump in a bottle of beer....because, why not?  While it was braising, I checked online to see if anyone had reviewed it and sure enough, it gets rave reviews! As of today there are 13 5-star reviews which is pretty darn good.  We liked it a lot too.  The sweetness of the raisins and dates were a great combination with the slight spiciness and other Indian inspired flavors. I was a little afraid I'd ruin it with the beer, but I couldn't tell the difference!  Sometime I'd like to do a braising test with water, chicken broth, wine and beer and see if the liquid makes a difference at all.  Maybe I just have a poor palate though, who knows.

All in all it's been a successful journey so far.  Tomorrow night we plan on traveling across the ocean to Brazil so stay tuned!

Sunday, February 24, 2013

Build-A-Font Workshop

My dreams have finally come true!  That's right, today I created my very own fonts.  It was so easy and fun, I might just make some more tonight!  I'm very thankful that the makers of iFontMaker decided to make a Windows 8 version of their app.  I was seriously contemplating getting an iPad just so I could use it.

What better way to show off my cool new fonts than on some of my delicious food pictures?  On the left is a font I called "SkinnySnowmen" featured on a bowl of Spicy Southwest Pumpkin Soup I made last fall.  I made the soup for my brother and his girlfriend when they came to town to visit, and it was a big hit!
And on the right we have my new font called "Snowmen" on a plate of crispy, flaky catfish that I made while the boyfriend was away.  It was the first time I'd used my little deep fryer in a while, and it was a huge success.  I couldn't believe how great the fish turned out.  My favorite part though was the dipping sauce.  It was a great spicy alternative to tartar sauce.

Obviously I have snowmen on the brain today.  My house is still full of them...I think there are about a dozen of them staring at me right now while I type this.  And we got way more than enough snow the last few days to go make a real live Frosty, but instead I stayed inside creating these cool fonts.  I hope they push out some updates to the app as I think it could be even better.  The main thing I noticed is that it seems to only create fixed width fonts.  You'll notice that the i's take up the same amount of room as the w's and m's, which I'm not a huge fan of.  It makes the words too spaced out.  But I have faith that they'll fix that and some other things, hopefully soon!

Monday, July 4, 2011

First Trip Down Whoopie Pie Lane

Okay readers, everyone turn to page 108 of Baked Explorations. Today's lesson will be on the classic American dessert - whoopie pies. What's that you say? You don't own your own copy of Baked Explorations yet? You haven't even picked up the Brooklyn Boys' first edition of Baked?! And you have never had a whoopie pie??? *Gasp* Actually wait...I've never had a whoopie pie either. I'm not sure how you can go around calling something a classic American dessert when I doubt many Minnesotans have ever had one let alone made their own from scratch. I definitely think they are more of a fad with foodies right now than a timeless classic. Between their two books Matt and Renato actually have three versions - Pumpkin with Cream Cheese, Chocolate, and Red Velvet. Oh and within the Chocolate recipe they have a variation on the filling for peanut butter. There must be something to these little pie/cookie/cake wonders so I decided to start with the basic chocolate and see how I liked it. After tasting an extra half with some Swiss Vanilla Filling I have already reached a conclusion - I think I'm going to open my very own Whoopie Pie Shoppe! ;)
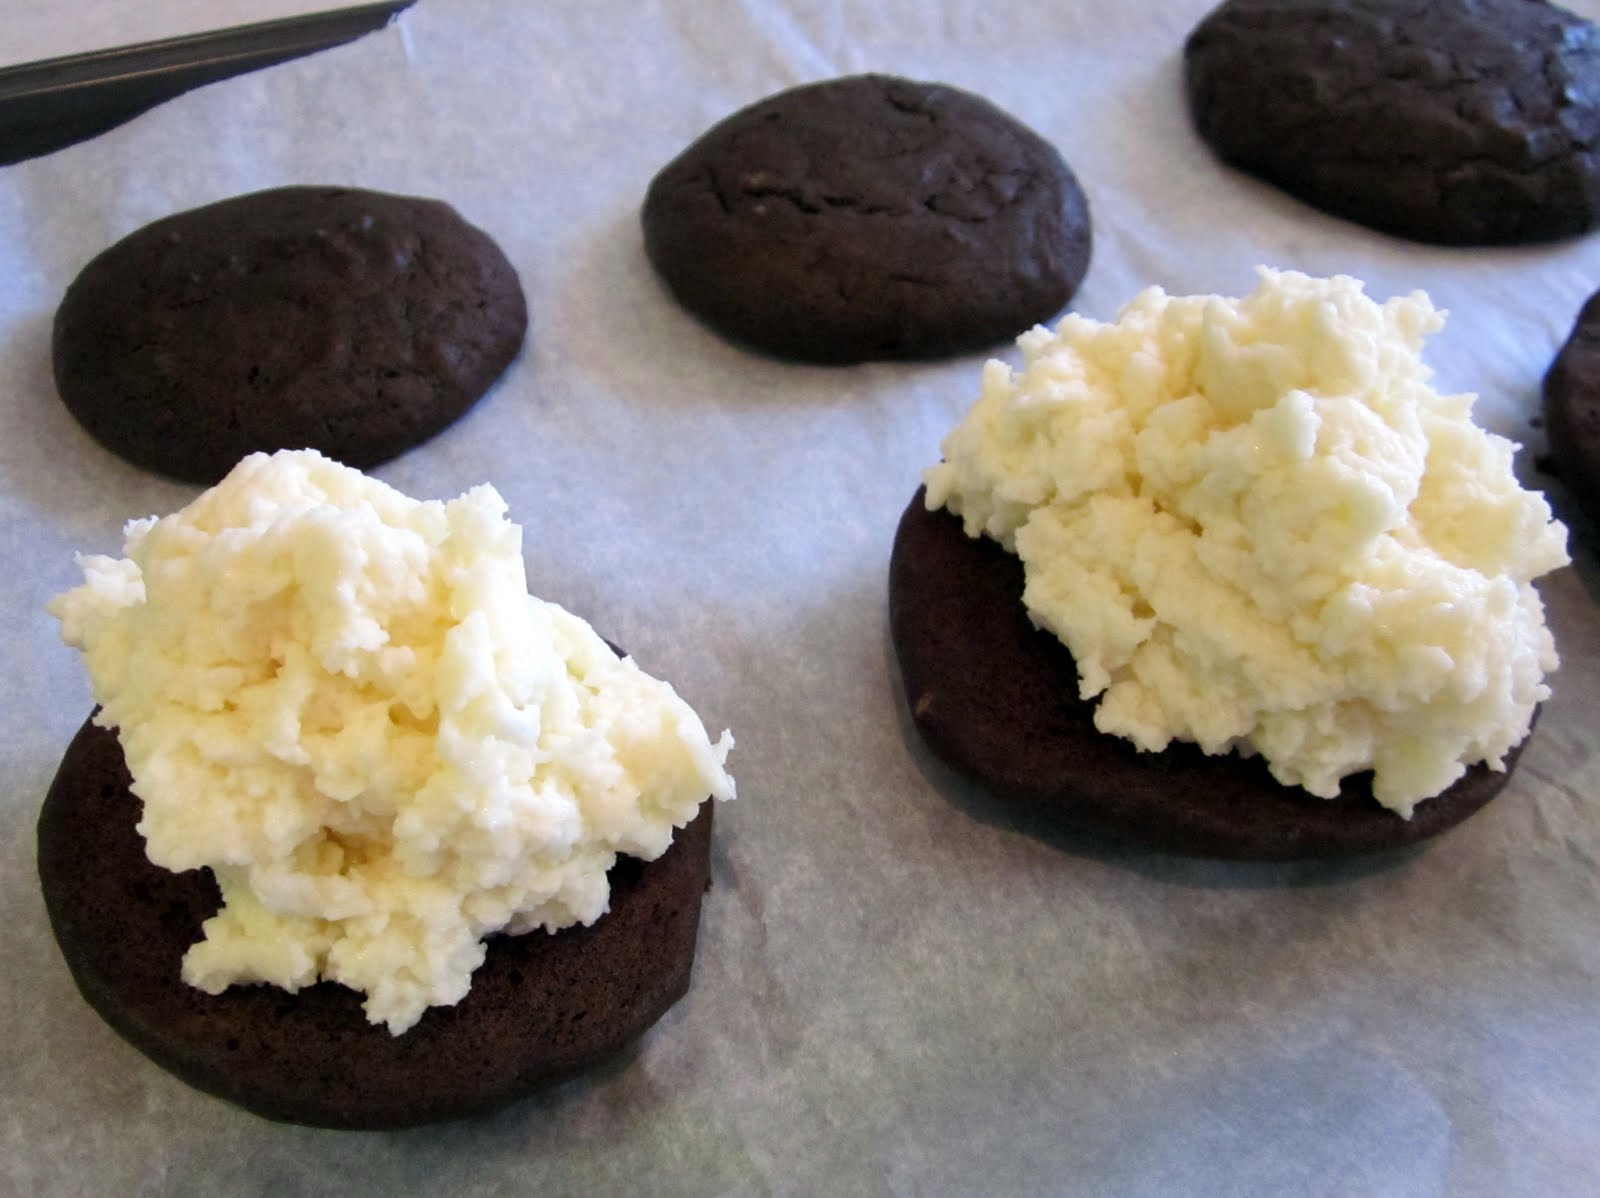
Chocolate "cookie" halves with blobs of cream filling

These took a while to put together so I'm glad I had all afternoon to spend on them.  Maybe I should take every Monday off to test out new recipes...I'm sure I could get a lot of my coworkers to back that idea.  First you have to mix up the dough/batter for the cookie/cake halves.  The recipe calls for 1/2 cup hot coffee and I found out when making cupcakes a while ago that my taste for flavored coffee actually comes in quite handy in this situation.  I brewed up a fresh pot of White Chocolate Obsession and I think it really adds to the depth of flavor.


After plopping on big blobs of cream I smoothed them out with my handy dandy little spatula.  Then I smooshed down the tops and wrapped up each one.  Matt (or Renato) says this recipe yields 10-17 pies depending if you go with the large Pennsylvania Dutch size or the smaller normal person size.  As I was scooping the batter onto my baking sheets I thought I had a lot - three sheets of 6 and another of 3, that's 21!  And then it hit me...that's 21 *halves*...apparently I went for Pennsylvania Large.  But that's okay with me.

I wonder if I can convince my coworkers to cut them in half tomorrow and spread the Whoopie Pie Love...

I also wonder if Baked #3 will have a boozy version of these delicious little pies or if I'm going to have to come up with one on my own?

Friday, June 24, 2011

Cake Final Exam

I needed an inspiration for my final cake design.  I wasn't really feeling the example designs out of our instruction book, they were a little too old-school for me.  I actually had a birthday to bake for that Monday, but I didn't want to give him a cake a day late.  And I already had a different inspiration for a treat for him (which turned out very yummy btw).  So I was really excited when I found out one of my friends at work was going to find out the gender of thing growing inside of her the Friday before.  Now we don't have to call it a thing anymore!  It's going to be a beautiful bouncing baby boy.  I spent some time over the weekend coming up with this design and was pretty nervous about how well I was going to be able to execute it at class because I wanted it to be perfect for her.

The first part of class we practiced writing and making Wilton roses.  Writing actually turned out to be kinda fun and easy.  The first time I tried it on my leftover cookies I was missing a very important trick - add a bit of piping gel to your frosting to help make it smoother and easier to squeeze.  It was fun but a little tricky practicing on the practice board because I'm not used to writing in cursive at all!  For some reason it felt fairly natural when writing in frosting though.  I'm definitely not as scared of it as I was before and no long *quite* as impressed with the beautiful writing I see on the standard cakes at every grocery store.  The roses were also pretty cute and easy as soon as you know the behind-the-scenes secrets.  After learning each step the mystery was revealed and I soon had my first frosting rose!  I wish I had a picture of it.  It definitely wasn't perfect but what rose in nature is?  It looked real with all it's little imperfections!  I need to make some more practice ones soon before I forget the technique.  Anybody want a cake full of random roses? :)

Finally it was on to the main event - implementing the design on my cake that I literally dreamed about the night before.  I had brought with a printout of the outline of my design and tried the technique we had learned the first week with using piping gel to transfer it on to the cake.  Unfortunately this was just full of fail.  I couldn't see the lines at all.  I think if I try this again at home I'll try coloring the gel slightly so it stands out better.  But I forged ahead - freehand!  I thought for sure I was doomed.  Who thought it would be a good idea to try to freehand multiple perfect circles and straight lines?  I don't think I did too bad...

My final - I passed! :)

I wasn't super happy with the writing, but the rattle turned out pretty cute.  The picture below is before I added the yellow dots for a finishing touch...I definitely didn't decide to do them to cover up any imperfections there may have been in the white icing.  No no, not at all.


The colors came out so cute!  I had a really hard time with the brown and wanted to give up more than once.  I started with "brown" but it was very very light and not what I wanted at all.  So I added a bit of black to darken it up but that gave it a charcoal gray affect.  I added some red to brighten it up which did absolutely nothing.  Finally I poured in red, blue and green and mixed vigorously and to my surprise I got the perfect dark chocolate brown that I was looking for!  Not too shabby for my second cake and first original design. 

I tried to do the same border I wanted to do on my first cake.  The first round I plopped onto the cake turned out terrible so I finally asked the instructor for help.  She showed me on my practice board and then I was like oh yeah...the practice board!  I did a few lines for practice and then wiped off the mess I made before.  I could never quite get it exactly like I wanted, but it turned out wayyyy better than the first time!


Oh and my coworkers loved it.  Everyone took a moment to admire it before letting anyone cut in :)

Saturday, June 4, 2011

Frosting to Cupcake Ratio 1:1

Our third week of class we were to bring 6 cupcakes and green icing for leaves, light blue and dark blue for pompom flowers (which sadly I have no pictures of), and a flower color of our choice. I made a bright yellow which you can beautifully piped on the top of this cupcake.  We actually made a lot of different flowers that night, but this one came out so nicely that I didn't want to ruin it with random flowers.

First we practiced drop flowers, which are made with a big star tip and rotating your hand about 90 degrees while squeezing out the icing.  These actually frustrated all of us because they left a big hole in the middle and didn't turn out like the picture on our practice boards.  The turning motion got tiring after a while too.  You're supposed to go back and put a dot of another color in the center, but I never did that since we were just practicing.  Next up were rosettes, which turned out to be one of my favorites.  They were really easy and I thought looked really good as a border.  I tried doing both drop flowers and rosettes on top of one of my cupcakes.


Unfortunately, as you can probably tell as soon as I put my lid on my box to take my cupcakes home I smooshed the frosting down so my pretty pretty flowers got flattened.  I was fairly devastated.  But not as devestated as I would have been if my frosting hadn't stayed inside it's container when it crashed to the floor earlier that night!  It's very hard working with so many unfamiliar things in such a confined space.  At least that night I had decided to scoot down a seat so my friend and I were actually taking up two spots since our class wasn't full.  It was nice finally getting my mis en place in order.  After the rosettes we moved on to shell borders, which are a lot harder than they look.  I never really could get it down.  Apparently it's the same technique I was supposed to use when doing the border on my cake - if only we had covered it last week!

Not in love with the "flower" but the leaf turned out pretty!

Then we moved on to pompom flowers which I loved making.  If you want to see a perfect one click here.  Mine were pretty close to the same colors but not quite that perfectly shaped.  Definitely something that was fun to practice though.  Next came leaves which are surprisingly easy - the leaf tip does all the hard work for you.  Last but not least was the shaggy mum that you can see pictured above.  When I brought these into work the next day, everybody said those looked more like Cookie Monster on a bad hair day than any type of flower.  I agree...not my favorite out of the bunch.  Unless you want an excuse to pile on a mountain of frosting.  And yes - there are certainly times that I do!

Monday, May 30, 2011

Session 2: Real cake!

Cupcake on top of my first cake
Right away the second week we were to bake a cake and bring it to class to level, split, fill, ice and decorate. This was all very intimidating to me especially after the day I'd had. I had been in Des Moines for my nephew's baptism so Monday morning I had to get up and drive almost three and a half hours back home. Then start laundry, run to the grocery store, and come home and bake a cake. Oh...and last but not least whip up my first double batch of Wilton buttercream frosting...phew! By the time class rolled around I was pretty pooped already. Now I had to try my hand at icing and decorating in not only a room full of strangers, but a whole store! We took the classes at Jo-Ann Fabrics in Apple Valley which apparently doesn't have a separate room for classes, so we were out in the middle of everything. We had more than a few wandering onlookers each week.

This week we got a few more tips and bags dirty.  The first tip we were supposed to use was 18, which in the craziness of my day I managed to leave in the little cubby of my dish drying rack but thankfully my friend let me borrow her tip 16 which is pretty close.  We practiced curving lines, zig zags, dots and "dimensional decorating".  I have to admit - the practice board that comes with the kit is the best invention ever.  I had seen it many times in the store before and thought it was silly, but I was completely wrong!  You can screw up as many times as you need to until you get the hang of it.  Just wipe the board clean and try again!  Definitely better than messing up a cake because you have no idea what you're doing. Speaking of messing things up because I thought I'd try something on my own...


...yeah, my border didn't turn out so hot.  I thought the one in the picture looked sweet so I tried it out.  (Hint: theirs does not look anything like that.)  For decorations that night we had our choice of the cupcake, a fish or a hamburger.  My nephew told me to do the cupcake so that's the one I went for.  I really dug the idea of the gel piping transfer.  If you have a basic outline of the shape/design you want to do, just print it out and flip it over.  Then take some piping gel and trace the outline on the back.  Then flip it back right side up and gently set it down in the middle of your cake.  Run your finger over the paper and your design is now on your cake ready to be filled in!  Pretty neat.  For the inside of the cake, the first week our instructor used one pudding Snack Pack.  Since I already had enough to worry about with baking the cake and making the frosting, I thought this sounded like a grand idea.  Unfortunately it turns out one pack really isn't enough...I could hardly tell there was anything in there.  If I decide to do that again I will definitely use two!

Oh and yes I did bake the cake from scratch and even though I made not have done a perfect job decorating it still tasted great!  Recipe to follow in another entry...stay tuned :)

Wilton Decorating Basics - Class 1: Cookies

Practicing my stars on my star cookie for Course 1
A few years ago I watched every cake decorating, designing, battling show that the Food Network aired. I thought Duff Goldman was the coolest, funniest guy on television. He made it all look so easy. Just roll out the fondant, plop it on the cake, make some things out of modeling chocolate and BAM - awesome-out-of-this-world cake that didn't even look like a cake. I thought to myself...I can do that. If the girls on Ace of Cakes can do that, why can't this computer nerd who had only ever made like one cake from scratch in her life (up until that point anyway). So off to the craft stores I went, coupons in hand, and bought everything I thought I needed. And I just went for it. Turns out it's kinda hard. I really had no idea what i was doing. And the store bought fondant is not good. Who am I kidding...it's downright disgusting. Alas, my passion for baking and this blog was born. I no longer watch any of the crazy cake challenges or even the Ace himself, but when a friend asked if I wanted to take the Wilton cake classes with her, I was in. I thought maybe with a little guidance and some practice I may be able to produce something a little more photogenic than those first two attempts years ago.


For the first class we were supposed to bring the Course 1 Kit, 6 "round" cookies, Ready-To-Use White Decorator Icing, and lots of other stuff we didn't really need for night one.  It was more lecture and learning than hands-on that night.  Our instructor showed us how to whip up the Wilton recipe for buttercream, how to level and split a cake, and then how to add filling between the layers. We got to see and feel the difference between different icing consistencies - stiff, medium, and thin - and which applications each one is for.  She "torted" her cake for us which I guess just means cut it into layers, although after doing some googling this does not seem to be the proper definition of torte.  Torte is a specific kind of cake, no where can I find an official definition of it as a verb...oh well...moving on...


So as you can see, right off the bat I didn't exactly follow instructions.  Plain round cookies sounded boring to me, and if I was going to get everything dirty cutting out cookies I was going to have fun with it!  Turns out I only have a bin of holiday cookie cutters, so from that I pulled out the star shape.  I also had some small flowers that were officially fondant cutters, but the biggest one worked pretty well for a small cookie flower.  Unfortunately this proved more challenging when it came to decorating.  We only learned how to pipe stars in the first class (best seen in the first two photos) which I had troubles translating to the star and flower.  By the end of class, my creative juices were gone.


Tuesday night my creativity came back a little when I went to decorate the rest of the batch and use up more of the store bought buttercream (the rest I ended up throwing away...I realize now it probably would've kept in the fridge forever, sigh).  I did a lot of random patterns and then realized that weekend was Mother's Day!  So as you can see I attempted "MOM" but it didn't turn out so well.  I was starting to dread the night we had to do writing, it's a lot harder than it looks!

Sunday, April 10, 2011

March Birthday Madness!

Towards the end of January I decided on my mission for the year and hopefully many years to come.  You may call it a New Year's resolution, but I'm not.  Mainly because 90% of New Year's resolutions fail within the first month (but 66% of statistics on this blog are made up on the spot) and I really want to follow through with this one.  I want to make birthday treats for my co-worker's birthdays throughout the year, but I also wanted everyone to have the opportunity to tell me what they want.  In the past I have always just made whatever random thing I felt like whipping up.  So I created a Google Calendar and added everyone's birthdays and allowed them to edit the details of the event.  I also thought this would be a good way for me to share the recipes after I make them because I always seem to get numerous requests!

March was a pretty busy birthday month around the office.  And when you throw St. Patrick's Day and my mom's birthday into the mix, my kitchen had dirty dishes in the sink pretty much every night.  I started out by going a little crazy chopping up a few peanut butter cups.  Forty of them to be exact.  Yep, just a few.  Okay maybe more like a mountain of them.

Chopped, mixed with creamy peanut butter and slathered on top of marshmallowy Rice Krispies resulted in this:
All that chopping was well worth it.  Yum.


Next up was something I had seen a while ago while browsing baking blogs and immediately bookmarked.  This time around I was chopping up caramels, but they didn't take me nearly as long as the peanut butter cups did.  I had already decided who I wanted to make this for and the week before his birthday we were actually teasing him about losing a jeans size because he was eating Special K crackers at lunch (and this is not a guy who needs to drop any sizes).  It was perfect.

Cream cheese brownies layered with caramels and *peanut butter* sandwich pretzels.
I think the only thing missing here is the kitchen sink.  Salty and sweet perfection.


St. Paddy's Day was coming up and the same day I made the brownies I had Guinness-Braised Beef Brisket going in the slow cooker.  So I started looking around to see what I could bake with Guinness.  Last year I made Guinness Ice Cream for our party at work which I absolutely loved.  CHOW had featured a Gingerbread with Guinness that I thought sounded pretty good but the first and only comment on the article was a link to a "better" recipe.  I decided to go with that one instead.

I was actually a little disappointed in this one. Not sure if I did something wrong, or if it just wasn't my thing. Too gingery for me.

Gramercy Tavern Gingerbread


And then St. Patrick's Day was upon us.  There was no question what I was going to make, the only question was if I had the energy to make it.  This was not going to be a small task, especially for a weeknight.  But after I took my first bite of cupcake and ganache, I'm so glad I went through with it.  Ho...ly....cow... 
Guinness chocolate cupcakes.  Filled with whiskey chocolate ganache.  And topped with Bailey's buttercream frosting.  What does that give us?

Irish Car Bomb Cupcakes


The next two birthdays came up right in a row - one on Friday and the next on Saturday.  After all that work for the cupcakes I didn't know if I was up for going all out on two completely different desserts so I asked if they could agree on something.  They requested coffee cake and that got me pretty excited.  There's a ton of coffee cake recipes I'd been wanting to try.  Especially the one in my favorite new cookbook Baked.  Theirs contains chocolate which sounded yummy but I wanted to have some variety so I thought I'd do a fruity one too.  I'm glad I continued my search because it made me discover one of my new favorites.  And it's even a "light" recipe!!

Fruity won over the chocolaty IMO. On the left we have Cooking Light's


and on the right is the Baked dessert duo's

Sour Cream Coffee Cake with Chocolate Cinnamon Swirl


I think the reason that I wasn't in love with the chocolate cinnamon swirl is because I kind of burnt the pecans that were in the crumble when I was toasting them.  Everyone else said they couldn't tell, but I definitely could.  I vow to give it another try with lightly toasted nuts.  Almost every recipe in this cookbook intrigues me, but as you may have noticed nothing interests me more than adding a splash of alcohol here and there.  I honestly don't know why, maybe I just like the idea of creating "grown up" desserts.  So off to the liquor store I went, having to ask where the bourbon was and how it was different than whiskey.  I only needed a few tablespoons, but $40 later I was ready to make two incredible looking pies.

For some reason last fall my little brother decided to start making homemade pies - including crusts from scratch.  This was one thing I hadn't tried to tackle yet.  He made it look time consuming and complicated and honestly pies have never really made me go MMmmmm...probably because they're usually filled with fruit.  But the guys from Baked really know how to make my heart flutter - booze and chocolate.  And they made the pie dough making process look really really easy, just dump everything into the food pro....pulse, pulse, pulse, pulse....and voila, scratch made pie dough!

Pretty much a big chocolate chip cookie with a pie crust.  Amazing.

Tuscaloosa Tollhouse Pie


Okay so *technically* this next pie was for my older brother whose birthday is in April BUT it was also for my mom whose birthday is March 20th and after making all these treats for co-workers and not anything for my own mom I felt terrible.  But I knew they both loved pie, so hopefully she was okay getting her birthday surprise a couple weeks late.

I was sad that the crimped edges kind of fell in while baking.  It had went into the freezer so perfectly the night before.  I guess I'll have to work on that.
Tasty.

Chocolate Bourbon Pecan Pie


Phew!  I'm exhausted just thinking about all those dirty dishes I had to wash.  But every single one of them was worth it and each one was a unique learning experience.  I can't wait to see what I'm whipping up this time next year!!

Thursday, January 6, 2011

Continuing My Love of Capers

And no I don't mean going on crazy escapades - I'm talking about those little green balls of explosive flavor (completely the opposite of peas, which are little green balls of mushy poison). You may remember my first tryst with these little lovelies in the gremolicious gremolata.  This is a very classic preparation of a picatta (or apparently piccata?) although I did not have fresh lemons on hand, which is why I decided to go with this dish instead of venture out to the grocery store in the rain/sleet/snow storm that we were having.

(I actually got this recipe out of a free issue of Cuisine at Home I received, but this looks to be the same recipe almost verbatim.)

Obviously I need to work on my chicken breading and browning skills because this did not come out like any of the pictures...(note to self, cramming four chicken cutlets into a wok does not work very well).  However it was still very tasty.  I served it with plain jasmine white rice and honey glazed carrots (yay for quick but tasty microwave sides) which actually turned out to be a nice combination of flavors.  I found myself mopping up the leftover sauce from the chicken with the carrots and mixing every bite of rice with a little chicken.  Yum.

Quick & Dirty

Changes:
  • Used regular chicken broth instead of low sodium (although it seems like a lot of things are calling for this, maybe it's worth trying to see the difference?)
  • Used bottled lemon juice and didn't finish the sauce with fresh lemon slices
  • Didn't garnish with fresh parsley
Yuminess:
  • The sauce was to die for.  When I added the final butter to thicken it up I knew it was going to transport me straight to Italy.
  • Given how sophisticated the flavors were, it was actually a pretty quick and easy dish to put together
  • I was surprised at how good the Green Giant honey glazed carrots were (it's nice to have a good cheat like that once in a while)
Sadness:
  • My failure on the browning of the chicken.  All the Food Network chefs were yelling in my head "Make sure the oil is hot!  Don't crowd the pan!"  Sorry I let you guys down :(
  • I would've been able to get much prettier pictures if I had fresh lemon slices and parsley.  Oh well, there will definitely be a next time :)

Wednesday, January 5, 2011

Best. Muffins. Ever.

One of my favorite parts about fall is that it's time again to make pumpkin flavored everything. Pumpkin pie, pumpkin bread, pumpkin cookies, pumpkin bars, maybe next this year pumpkin soup?  Aarti even made pumpkin oatmeal this week, which sounds crazy delicious.  I can't believe I only made these muffins because I had half a can of pumpkin filling and half a bar of cream cheese leftover from other ventures! I also can't believe these innocent looking things set off my smoke detectors (and the bacon the night before did not!)


I made a dozen of these in my normal sized muffin cups but I think next time I might try upgrading at least a few to the mammoth jumbo size muffins.  The normal sized ones were gone after only a few bites and I was left wanting more, more, more!  I think they are close to the top of my list of new favorite desserts.

Quick & Dirty

Changes:
  • Cut the recipe in half (9 servings) because that's how much pumpkin and cream cheese I had on hand, but I ended up getting 12 normal sized muffins out of it
  • Added some pumpkin pie spice in addition to the cinnamon in the muffin batter
  • Almost doubled the amount of brown sugar in the cream cheese filling as suggested in reviews
  • Didn't add the pecans to the topping, usually not a huge nut fan in desserts
Yuminess:
  • I think just making the pumpkin muffin by itself would be pretty tasty
  • The addition of the cream cheese and streusel topping make these divine and decadent (this is definitely something worth spending the calories on)
  • If you like pumpkin bread/cake/bars and you like cheesecake you will be in heaven with these
Sadness:
  • They are a little bit of work, and trying to add the cream cheese to the middle of the muffin batter was kind of a pain.  Next time I'm going to see if there's a better/different way to do this that still yields the same yummy results.
  • As I mentioned, my smoke detectors starting going off after they were in the oven for almost exactly 20 minutes for some reason...I think they could've used a couple minutes longer but I was scared and pulled them out and shut off the oven.
  • These were a big hit at work, I was sad that I didn't have a ton to give out to everyone!

Monday, January 3, 2011

Baaaaaacon....and other nummy stuff

Bacon, bacon, everybody loves bacon!  Well...to be perfectly honest...up until I made this dish I wasn't a huge fan.  I didn't exactly hate it, but I wasn't head over heels in love with it either.  I just never understood what all the fuss was about.  Maybe that's because most of my bacon eating experiences over the years consisted of fresh out of the microwave pieces of greasy or dried up bacon slices.  But this combination of pasta, cheese, chicken, eggs and you guessed it - bacon - has changed me into a true believer.  And I know, that all sounds super healthy, but it can't be that bad if it's from Cooking Light...right?  Even if I eat a heaping plateful of it...? :)


Oh there's the healthy twist - asparagus!  Which was actually a very yummy addition.  Plain asparagus is an okay side dish but not one that I get real excited about, but the cheese and bacon flavors with it in this dish really jazzed it up to the next level. I'm glad I was so lazy and tired earlier in the week that I picked up a rotisserie chicken and got to make this with the leftovers.  There was nothing leftover tasting about it.

Quick & Dirty

Changes:
  • Used two real eggs instead of an egg substitute
  • Used a white cooking wine instead of vermouth
  • Cooked the onion and then everything else in the same pan as the bacon (after removing the bacon) to soak up all that great bacon juice - probably not recommended by CL but I think it's what made the dish so delish
Yuminess:
  • The combination of asparagus, chicken, cheese, and bacon all in one bite was fantastic
  • This is one of the first dishes where I must say the pieces of parsley really helped lighten and freshen things up
  • Made Jimmbo's Garlic Knots from AR to serve alongside which complemented the dish beautifully
Sadness:
  • Made a little too much pasta...the asparagus to chicken to pasta ratio could've been better
  • I think I added the egg mixture a little too quickly to the hot pan because I did end up with a little bit of a scrambled egg affect instead of a creamy sauce
  • Very sadly I had to throw almost half of it down the garbage disposal because I didn't finish it all before leaving for a week for Christmas and was scared of it when I got back.  For some reason I didn't think it would freeze well, but next time I will try this since I can't think of anything worse happening than having to toss it out again.

Monday, November 29, 2010

Menu Item Numero Uno

If I ever open my own restaurant I think I found the first thing that will definitely be on the menu, especially during the winter. This Butternut Squash Soup will warm you up on even the chilliest of days. It's the perfect menu item, no matter what type of restaurant - little soup and sandwich bistro, specialty baked goods and treats, five star gourmet. I could see people coming back again and again just for this soup.


It would be a great appetizer as it wakens all your taste buds. At first you taste the sweet butternut squash and coconut milk, then you get a hint of thyme and sour cream before the heat of the jalapeno fills your mouth. Every bite is a journey for your mouth.

Quick & Dirty

Changes:
  • I didn't remove ALL of the jalapeno seeds because I wanted to make sure it had enough "kick".  I left about half of them in, and it was just about perfect for my taste buds
  • Sprinkled some dry thyme on top, didn't have any fresh
  • Also ate it with whole wheat crackers mixed in, very very tasty
Yuminess:
  • The mix of sweet and spicy is my favorite, and this is a new combo of the two for me
  • Both the warmness and the spiciness of the soup is perfect for a cold winter day
  • I ate it all too fast to try it, but this would probably freeze well if you made a huge batch of it
Sadness:
  • I was selfish and ate it all myself, next time I'll try to make enough to share
  • Butternut squash is kind of a pain to work with, otherwise I would make this all the time
  • Making soup like this makes me want to get an immersion blender...just what I need, another kitchen gadget!

Sunday, November 21, 2010

Eating an Identity Crisis

For about the last year and a half the project I've been working on is for a client out in Boston. We finally went out there a couple weeks ago to do on-site training and implementation. The clients were nice enough to provide muffins and other goodies throughout the day and in the morning I helped myself to what looked like a Boston Cream Pie muffin. They raved about how good these muffins are and how we wouldn't be able to get anything like them back in Minnesota. Well, I didn't think mine was that great. In fact, I didn't really like it at all and was glad I only took half. It had some weird flavoring that I wasn't expecting (orange flavored custard?). So after a long day of training and an awesome but not quite satisfying dinner, we went in search of dessert. On a dark, cold and rainy night we were lucky enough to wander into Quincy Market which was lined with various restaurants and bakeries. After walking up and down the aisle checking every place out, we finally picked out a couple creamy pies and sat down with forks at the ready. Only to be disappointed again. It was at least better than the muffin; the custard was pretty tasty. But there wasn't enough of it and the cake wasn't very flavorful. I guess that's what you get when you buy something that's probably been sitting out on a shelf all day.

I didn't get my craving satisfied while I was out in Boston, so I decided to satisfy it myself in my own kitchen. I've actually had this recipe for at least a year now, thinking I would make it when the project was over. Well, it's pretty close to being over now (crossing my fingers) so I thought it was finally time to celebrate. It took me almost all day on Sunday to make (scratch-made yellow cake, scratch-made chocolate cake, vanilla-rum custard, chocolate glaze, and assembly) and I was so worn out by the end of the day that I ended up having cold waffles for dinner (homemade buttermilk waffles that I had made the day before, don't worry they weren't frozen Eggos). It was all completely worth it though, especially getting to share it with everyone at work. I brought it in and everyone was so excited that I had made cake. But, I said, it's not a cake - it's a pie! Or is it a pie-cake? One thing is for sure, it was absolutely delicious!  And it's the least I could do to say a big Thank You for all the hard work everyone has put in.

Unfortunately I got this from a free preview issue of Cuisine at Home and they don't have the recipe online.  I'll have to type it up soon and post it so everyone can share in the goodness!

Spreading the second layer of custard

I thought it kinda looked like a hamburger at this point

Final chocolate glaze


Quick & Dirty

Changes:
  • Will try to use real vanilla bean in the custard next time (I had a couple but I didn't realize they went bad!  The ones I had were stiff as boards and there was no way I could split them and get the goodness out of them)
  • After making the cakes, I think I should've stored them in airtight containers instead of letting them sit out all day to cool.  I think they may have dried up a bit.
  • I used 8x3 pans instead of 9x2 because that's what I had.  I think it made the cake taller but not a big deal.
Yumminess:
  • The chocolate glaze was amazing
  • Everything...even though this was quite a bit of work I could definitely see myself making it again.  I only got one little piece!
  • The Vanilla-Rum Custard was pretty tasty, I could see making it for other things (maybe some custard filled donuts?)
Sadness:
  • I think fresh vanilla bean really would've helped the custard pop even more
  • Did I mention I only got one piece?!

Saturday, August 14, 2010

WPF Ribbon Control officially released!

Word 2007
It's about time that I write a post about programming instead of cooking and what better way to start than a control I swore I would never use: the Ribbon Control. Those of you who have used the new Office 2007 or 2010 know what I'm referring to. Microsoft decided to switch up the normal menus across the top in 2007 and make us wonder why we could no longer go to File > Print and sent us searching for the Print button until we realized there was a big flashy round button that we were supposed to click on that held enormous power.
Word 2010

And then right away in 2010 decided this was a bad idea and gave us our File menu back.

Like most people, I hate change. If I have to go hunting for something as simple as Print or Save when I knew exactly where it was in the old version then it was a bad change. The thought of adding such a control to one of my own applications did not appeal to me at all. With the ribbon control, it felt like you were hiding functionality instead of giving more power right at your finger tips and making things more intuitive. I was also afraid of making an application that looked and felt exactly like Microsoft Office because this is the only place so far that the control is widely used.

Then one day a few weeks ago I was watching a demo of a competitor's new product that happened to use a ribbon at the top for it's main navigation.  And you know what?  It looked frickin' sexy.  They had a black theme going (similar to my 2010 screen shot above) and I fell in love.  About a week later I saw the announcement that the control had finally been released in all it's glory and I couldn't wait to get my hands on it.

So last weekend I finally got VS 2010 and Expression 4 installed on here and then downloaded the Ribbon Control and sample files.  As usual, my high levels of excitement led to quick disappointment.  I want everything to be easy to use right out of the box.  I started a new project in Blend and added a ribbon control and was overwhelmed by all the new controls and properties.  What's the difference between a RibbonGroup and a RibbonControlGroup?  What's the control in the upper left hand corner called and how do I add text to it instead of an icon?  Why are all the default colors so hideous and hard to change?  Oh yeah that's right, because Microsoft wants it to be difficult to style the ribbon and hopes we're all too lazy to figure it out.

After messing around with styles and colors for a while in Blend I decided it was going to be a lot of work to get my cool black theme going.  Next I thought I'd try to research some of these questions but this just led to more frustrations.  Of course there's only very basic documentation on MSDN:

"A RibbonGroup represents a logical group of controls as they appear on a RibbonTab."  Whereas "a RibbonControlGroup groups a set of ribbon controls into a visual and conceptual unit."

Well of course!  That clears it right up!  Some of the new controls actually have pictures which are very helpful, but it looks like very few do.  With such a visual control like the ribbon showing how a control will look and feel is kind of a necessity I think.  Then I remembered the guy's blog where I originally heard that it was released and read through that which was very helpful.  Yet I still didn't have any of my initial questions answered.  So I decided to check out the sample projects that I had downloaded earlier.  Surely they would lead me to the light of the ribbon. 

Sample Word App
Unfortunately I was quickly discouraged again because of the hideous UI in the sample apps.  The whole reason I wanted to use this control was because of how pretty I could make it.  I don't think their sample app really showcases those possibilities.  Really Microsoft?  You couldn't even include large icons that aren't extremely pixelated?

In the end I think I answered most of my own questions.  You can't easily put text instead of an icon on the application menu.  You have to override about 20 default colors to get rid of the blue/orange default theme.  I haven't given up yet though.  I've been working on my first ribbon app today and will be writing more later on some of my discoveries.

Saturday, July 17, 2010

Gremo-what?? Gremolicious!

Even with all the cooking shows I watch on Food Network and the recipes I peruse online and in my magazines I don't remember much talk of gremolatas.  According to my friend Wikipedia it's a "chopped herb condiment typically made of garlic, parsley, and lemon zest" and used in veal and seafood dishes but tonight I tossed it with my farmer's market fresh summer squash and ended up with an amazing side dish to go with my tuna cakes.  

Roasted Summer Squashes with Caper Gremolata

I *have* however, heard of pattypan squash.  I watched a repeat this morning of Iron Chef America: Battle Butter and the challenger used it in one of her dishes.  Alton said pattypan so many times I just had to try it and was super excited to see someone offering it at the farmer's market this morning.  They are very cute and colorful little vegetables.  I got a mix of light green and bright yellow and even one that was half and half.  I also got little zucchinis which I used a few of in this dish but also hope to make some spicy pickles out of.  This dish was bright and citrusy and an easy new twist on summer squash.

Quick & Dirty

Changes:
  • Accidentally bought regular parsley instead of flat parsley but I don't think that made much of a difference
  • I did slice up my zucchini because I don't think they were as small as the recipe called for and I was afraid they wouldn't get soft and tender if I didn't chop them up into bite size pieces
  • Cut the recipe in half...now I have to decide if I should make this recipe again to use up the rest of my pattypan or if I should venture out and try pattypan recipe #2!
Yumminess:
  • The capers and lemon juice really make the veggies pop
  • Pattypan has a pretty similar taste to other yellow summer squash, but the unique shape makes for a very pretty dish, and they're good for you too!
  • Have I mentioned how super easy the whole dish is?  Just chop up the veggies and pop them in the oven and while they're roasting you can mix together the gremolata
Sadness:
  • Nothing, really....this was a very sunshiny summery smiley side dish

Ssssssssspicy Shrimp Tacos

Last time I made a dish with salsa (the Avocado Salsa) I was very disappointed in the lack of heat. Most recipes tell you to remove the seeds and membranes from jalapenos because that's where most of the fire is and I've always followed that advice.  This time around I wanted the spice that the title of this recipe implies so I just sliced up the jalapeno before throwing the whole thing into the food pro (even though the recipe calls for a half of one with the seeds removed).

Spicy Shrimp Tacos with Grilled Tomatillo Salsa

And wow did it work!  The salsa was pretty amazing and maybe just a tad too hot for my taste buds (which are pretty wussy).  I wanted to devour all of it with chips before I even put it on my tacos.  Now my mistake with this dish came when I coated the shrimp with their spices.  I only used half a pound of shrimp but did the full amounts of hot pepper sauce, ancho chipotle chili powder, and ground cumin.  Yowzers were these some spicy tacos.  I could barely make it through two.  Luckily I listened to Cooking Light and served them with sliced cantaloupe which did help a little.  I would like to try making these again, cutting back on the spices and using fresher shrimp (the frozen shrimp ended up super rubbery).

Quick & Dirty

Changes:

  • One whole jalapeno with seeds in the salsa, I think with only a half and no seeds there wouldn't have been much heat at all
  • Cooked and frozen little shrimpies, this one was not a good change, can you say rubber bands?
  • Halved the amount of shrimp but covered them in the full recipe of spices, they were HOT!
  • Used chipotle chili powder instead of ancho because that's what I had on hand
Yumminess:
  • The tomatillo salsa was really good, it was my first time using the little green tomato-like fruit (although they are related to the gooseberry and not tomatoes) and I will definitely be making more salsa verde in the future
  • Cantaloupe is a good side for these spicy wraps
  • Ground chipotle chili powder is still my favorite spice of the summer
Sadness:
  • Too hot to eat although I (wo)manned up and finished it all off
  • Didn't make enough salsa!  Finished off what was left after eating the leftover shrimp taco stuff with yellow corn tortilla chips, yum
  • I wanted to smother these in sour cream because that really balanced out the spice but I also knew that would just be piling on the calories so I tried to be careful and just toughed it out